
Pin up Hairstyle
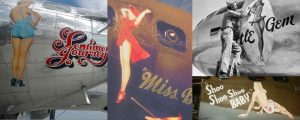
We all have seen or heard about Pin-Up Girls. Beautiful women with bouncy curls, rosy cheeks and hourglass figure, sounds like a dream girl, right? It all started at the 20th century, specifically 1930 by the hand of the illustrators Alberto Vargas and George Petty.
This phenomenon exploded in the 1940s with World War II and one of the most famous was (a real-life Pin-Up Girl) Bettie Grable described as a sex symbol perhaps it has a “innocence” air.
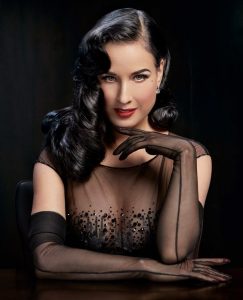
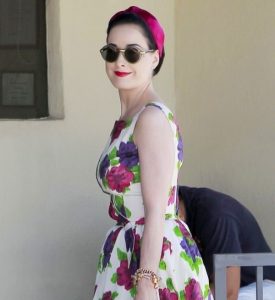
Nowadays, we can find many women that still working this sexy, classic and hypnotizing style such as Dita Von Teese.
Dita Von Teese hairstyles
We can describe this style as exotic, dramatic and glamorous, even like art. Pin-Up embodies eroticism and sex-appeal.
From beautiful, sassy and romantic lingerie to elaborated hair and make-up, many women around the world are trying to bring back to modern life this iconic and unforgettable style.
Besides clothes, first thing you see in a woman is her hair.
Pin- Up hairstyle seems to be quite difficult to achieve, but actually it is not. We all can do this elegant and classy style and transform into a sexy lady in only a few minutes!
Now, how can we do this? Don’t worry, here we have a Step by Step Pin-Up hairstyles you must try if you want to look like one of these iconic ladies.
First of all, the most recognized:
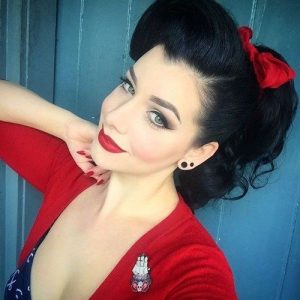
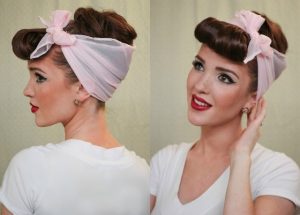
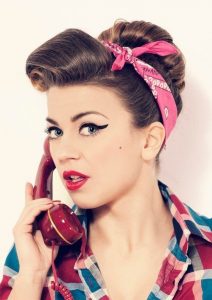
Pin-Up with bandana
This is a very classic hairstyle of this kind and includes a hair wear. If you want to go out, to a party and want to look amazing in such a short time, you should try this look. Does not matter if your hair is short, medium of long, this hairstyle works for all!
Step 1: Section some hair from your forehead area, smooth it out, leave some volume and pin it in order to create some sort of wave.
Step 2: Make a pony tail and twist it, not in a perfect way because later you must cover ii with the bandana. Keep twisting until you finish the whole pony tail and pin it in order to make it secure. (use as much as you need)
Step 3: Grab your bandana, and fold it into a triangle shape, then pull up the two ends and tie them on your forehead hair section. PS: MAKE SURE TO DO IT BEHIND YOUR WAVE!
Flip over the rest of the triangle and pin it right where the tie is.
Pin-up bandana hairstyle
And that easy you can wear a Pin-Up Bandana hairstyle!
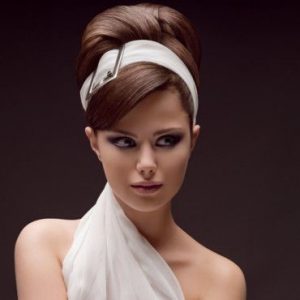
If you like the way it looks, you are going to love the next one. Also, using a bandana, this look would make you feel powerful and gorgeous, both at the same time!
Step 1: Make a wave again with hair from your forehead area, but instead of pulling down the pony tail, you must pull it up.
Step 2: Don’t loop the last loop of your high pony; twist the remaining hair around the tie. Pin it up at the end.
Step 3: Grab some pins and secure the ends of each side.
Step 4: Grab your bandana and fold it again in triangle shape but this time you are going to fold it all inside and out until you have a single line bandana.
Step 5: Tie your bandana over your ears (it depends on you) and watch out not to damage you wave!
There you have another sexy and beautiful way to wear a bandana on your hair just like a Pin-Up girl.
You might not want to wear a bandana always. Some girls like more classy and elegant ways to wear their hair that is why you will love the few next hairstyles.
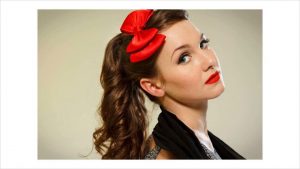
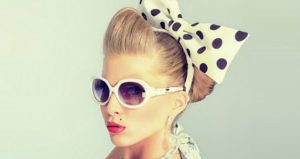
Pin up ponytail
Our very first one it’s called: “Pin-Up PonyTail” this one does not require you to curl your hair, ii is actually very simple and easy to make.
Step 1: Spare your hair into halves and twist a section until each ear. Push forward to create volume and secure it with pins.
Step 2: Make a low pony tail and you can put a ribbon or a scarf.
There you go! An easy and quick Pin-Up ponytail. So classy, you can wear it any time, such a party, a date or wedding.
1950’s Ponytail
The next one is known as “1950s Ponytail” a little more complicated but, very elegant and versatile.
Step 1: Section off bangs section of your hair.
Step 2: Brush back the rest of your hair and make a high ponytail, loop it all.
Step 3: Wrap your hair around your fingers and make a curl. Lay you curl flat and then pin it.
Step 4: Pull out some hair from your ponytail in order to create volume.
And done! You can also add a ribbon or some other hair wear to decorate your 1950s Ponytail.
This hairstyle looks so good that you are going to love it and wear it as much as you can. It brings us back to the decade where less was more, and you did not need that much to look gorgeous.
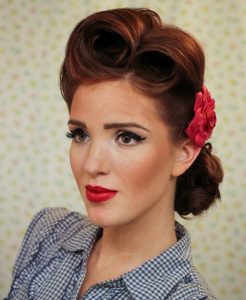
Gibson Tuck
The next one is called “Gibson Tuck” for this one you need to pull up all your hair. This hairstyle was very famous between housewives and “war girlfriends”
Step 1: Section off bangs section of your hair.
Step 2: Curl them until your ears and pin it.
Step 3: Create a low ponytail and make a small bun at the bottom of your ponytail.
Step 4: Separate your hair in the middle and flip the bun in. Pin it to place.
And once finished, you can add flowers or any whatever you want to make it more beautiful than this hairstyle already is!
Milkmaid Braids
Following, here you have the “Milkmaid Braids”. Sweet and innocent, you are going to love this one.
Step 1: Middle part your hair and braid first said above your ear and repeat on the other side.
Step 2: Pull across you head one of the braids and secure it with pins and repeat the process on the other braid.
This one, so easy and can use it any time you want.
We know there are a few hairstyles that include curling your hair and you might want to try them. Below we are going to explain how to make them easily.
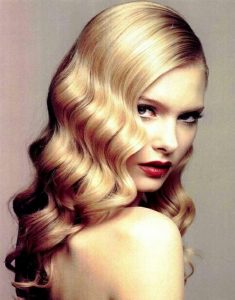
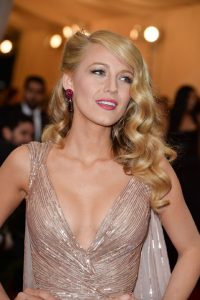
Vintage waves
This Vintage Waves section will show you how to achieve this sexy and glamorous looks you want.
Tools you are going to need:
Elastic to hold and separate sections of your hair.
Back and forward brush.
Styling spray.
An old make up brush.
A can of working spray.
Long clips.
A blow dryer.
And a curling iron.
Step 1: Brush all your hair and section it from the back. Put it in two pieces, use your curling iron and leave it on from 3 to 5 seconds. Repeat the process all over your hair and direction it the way you want.
Step 2: Brush it out and clip as you brush. Use the working spray in order to shape the waves.
Step 3: As long as you set the long clips pull back some hair with a brush, so you can create the wave illusion by using volume.
PS: Check the long clips with a mirror so your waves can have same length.
Step 4: Once you set all clips where you wanted them, set the waves with the styling hairspray and blow your hair in order to keep it all in place.
Step 5: Remove all the clips and with help of the makeup brush, brush back wild hairs around your face.
And Ta-Dam! You got waved vintage hair. A little bit difficult but once you make it you will love it.
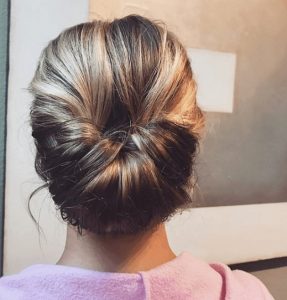
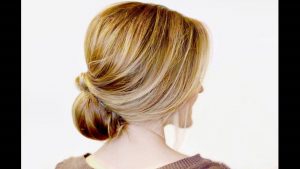
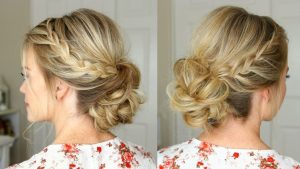
Stylized Low Bun
Likewise, you can find another style for your pinups looks like a beautiful one called ‘’Stylized Low Bun’’ this one is glamorous, classy and elegant; this stylized low bun is a treat to the eyes.
Very stylish to say the least, this hairdo also makes your hair appear sleeker.
For doing this one you will need:
Paddle brush
Fine comb
Hair elastics
U-pins
Bobby pins
Light-hold hairspray
Sectioning clips
Teasing comb
Rat tail comb
Step 1: Using the rat tail comb, make a deep side partition.
Step 2: Separate the crown part of the hair with the help of the rat tail comb then secure the crown part of the hair using a sectioning clip. This will ensure that it won’t interfere with the styling of the lower section.
Step 3: Tease the lower section using the teasing comb to create a voluminous effect and create a low side bun near the nape of your neck using the lower section.
Step 4: Release the crown section from the clip and tease its back for extra volume at the crown then smoothen the surface of the crown and brush it back towards the bun.
Step 5: Wrap the section around the bun; tuck in the edges of the upper section around the bun using U-pins.
Last secure the flyaways with bobby pins and make the hairdo stay in place with a light-hold hairspray and you will have an amazing pinup hairstyle that you can use even if you have short hair you can do this one and you will look amazing!
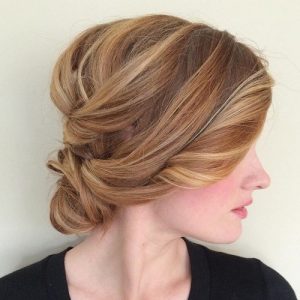
French knot
While the last one can sound a little bit difficult, the next one is easier. This one called ‘’French knot’’ is a chic and sophisticated hairdo to sport.
This is yet another delicate and dainty looking updo It’s easy to create and extremely beautiful and also a hassle-free updo and doesn’t require much effort to maintain.
What You Need:
Fine comb
Small hair elastics
U-pins
Bobby pins
Light-hold hairspray
Hair curlers
Paddle brush
Step 1: Make an off-center partition then curl the edges of your tresses using the hair curlers.
Step 2: Using the paddle brush, brush the hair on the smaller side of the partition towards the back of the head and secure it there using bobby pins.
Step 3: Roll the rest of your hair on the opposite direction to create the French twist and secure the twist with U-pins.
Finally styling the look with a light-hold hairspray and you are ready to go looking amazing!
Faux Hair
Following the easy ones if you are looking for something totally unconventional? Your search ends with the ‘’Faux hair’’ this one is perfect for hair that is of shoulder-grazing length.
Uber stylish and manageable, you should definitely give this one a try.
What You Need:
Fine comb
Elastic headband
Medium-hold hairspray
Lots of U-pins
Step 1: Make a side partition and let a face-framing bang to fall onto your forehead.
Step 2: Place the elastic headband around the crown of your head.
Step 3: Start taking small sections of your hair around the headband and start looping them through the headband.
Step 4: Keep tucking the sections and secure with U-pins as you loop them to ensure they stay put.
Finish the styling by spritzing on some medium-hold hairspray. Trust me this is easy to create and if you wear this with red lips you definitely will shine!
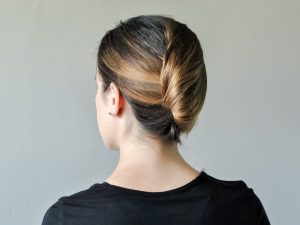
Chignon
Afterwards some looks that even when they are easy to do, they can look a little bit formal we have informal ones like the ‘’Chignon’’ This style looks complicated but it’s actually quick and easy.
Step 1: Pull hair into low ponytail.
Step 2: Separate hair above ponytail and then loop it through the opening.
Step 3: Flip the ponytail end up and through the same loop. Secure with bobby pins.
Step 4: Adorn with a bow or flower.
The best part of this one is that little girls can use this too and they will look totally sweet!
Bow bun
Now, talking about hairstyles that little girls can use we have another one called ‘’Bow bun’’ little girls do not need makeup, but they can be stylish. Try this simple and easy hairstyle for a natural and cutely stylish look
Step 1: Gather up all the hair from the top to make a ponytail using an elastic hair tie.
Step 2: Loop the hair through the elastic, but don’t pull it all through. Instead, create a loop leaving the loose ends falling on the forehead.
Step 3: Divide the loop into two then gather the ends and fold them into the space between the two halves, to make the center knot of the bow.
Step 4: Secure the loose ends using the elastic behind the bow.
Step 5: You can create a puff in the bow by pulling the strands of your hair, gently tugging them tighter.
For perfect results you may use a medium dry hairspray for a neat look, also is recommended to be very gentle while pulling the strands of your hair to make it tighter. Make sure, it’s not too tight but just sits securely without loose ends.
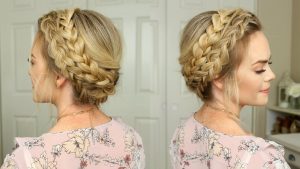
Milkmaid Crown Braid
Braids never hurt; looks with braids are always a good idea even for little girls so the ‘’ Milkmaid Crown Braid’’ is a nice one.
This hairstyle is smooth and captivating and gives to a little girl the perfect milkmaid-look.
Step 1: Part your hair in the middle to create two even sections. Take a tail comb and tease the crwn of your hair for a couple of small loose strands in the front.
Step 2: Separately braid both sides of the hair. To get a unique texture, use two smaller strands and one bigger strand in the braid.
Step 3: Cross the two braids at the crown of your head.
Step 4: Use bobby pins to hide any bumps showing at the back
Step 5: Tuck the braid ends into the top of the hair and pin them in the main braid.
Pin-up Victory Rolls
Now, back to the difficult ones we have a beautiful one pinup hairstyle called ‘’Pin-up Victory Rolls’’ this one is a bit more complex but worth it!
Supplies needed:
Boar bristled teasing comb
1″ curling iron
Bobby pins
Strong hold hairspray
A hair-tie
Step 1:
Start by drawing a curved line from temple to temple going upwards from one, and then back down to your other.
Tie back the bottom of your hair for later. Draw a straight dramatic side part and secure the larger section so it stays out of the way for the time being.
Separate the top third of your smaller side of hair and begin gently teasing the underside from the root to about the end with a boar bristled teasing brush.
Step 2: When you get to the bottom layer, tease the top of the hair. When you tease the larger side, you’ll do about 5 sections from top to bottom, and don’t forget again to tease the top side of the bottom section, not the underside!
Next, you’re going to draw a line of bobby pins on both sides about an inch in from your part to create a little base for the rolls. Go almost up to the front but not all the way.
Step 3:
Brush the ends of your section slightly to combine them better, then clamp the ends into your curling iron so the hair is going in an inwards direction: Roll all the way to your scalp, then by clamping and releasing repeatedly slowly release the iron from your hair while keeping the form of the roll.
Step 4:
Gently flatten the back of the roll and curls under to close off the back of the victory roll (since this is the more traditional look that we’re going for), making sure to bobby pin well! Shape the front of the roll as needed, make sure to bobby pin the roll from the inside out, and spray well with hairspray. Repeat step #3 and #4 with the other side, and your rolls are done!
Step 5:
Let down the back of your hair and comb it straight down and smooth. Pin another thick line of bobby pin holding your hair down this time from ear to ear and spray the back of your head with hairspray. Almost done!
Next, you’re going to curl the hair with a 1-inch curling iron, tease the top 4-6 inches or so of the topside of your curls, and start bunching them at the nape of your neck. Secure your fluffy bunch of curls well with bobby pins, spray well with some good hold spray, and add a little flower or bow to the side to finish it all off!
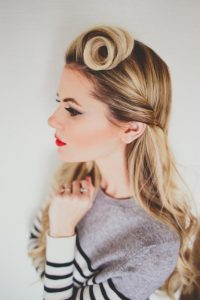
Modern Victory Roll
To finish these famous kinds of pin up hairstyle we have another type of Victory rolls these one is called ‘’Modern Victory Roll’’
Step 1: Section off a large chunk of hair on either side of your head and tie the rest of your hair back.
Step 2: Pull one side of your hair up (you can brush it upwards to keep it smooth) and form a small loop at the end.
Step 3: Roll the section of hair down towards your head following the loop and pin in place. Place pins at the front and the back of your roll to keep it in place.
Step 4: Repeat on the other side of your head.
Step 5: Clean it up! Pin up any loose hair (or runaway bangs!) and style the remaining section of hair from the back however you want. Spritz some hairspray to keep it all in place.
When my hair was longer, I would wear the back section down and curl it slightly. Now that it is quite short, I rolled it into a tiny bun.
As you can see the Pin Up hairstyles could be difficult or easy to do, but they worth it because most of them makes you look elegant, sweet and classy!
Even if you are not the biggest fan of this kind of looks when you tried some of them you will notice that you can shine with some of them so, don’t be afraid and try the Pin Up style.
We thank you deeply for reading this article until the end; we hope that was helpful to you in order to get you some ideas about Unprofessional Hairstyles.
If you enjoyed it or liked it enough please share with your friends or family so more people get to know about the topic, we will bring you more articles like this very soon.
Thank you again read us the next time!
¡Por cierto! Antes de que te vayas, queremos recomendarte esto que seguro que te interesa:
- Men’s Hairstyles
- Short Hairstyles
- Medieval Hairstyles
- Wedding hairstyles
- Layered Hairstyles
- Straight hairstyles
- New hairstyles
- Pixie Hairstyles
- Bun Hairstyles
Son una serie de contenidos a parte del que has leído que puede ser interesante para tí ¡Muchas gracias por leernos!